
You send a set of sheet metal drawings to a fabrication shop and receive a quote for CNC turret punching. The price looks reasonable—or surprisingly high. Either way, you want to know what is behind the number. When you ask the supplier to break down the cost, the answer is often a mix of machine time, tooling charges, and setup fees that do not map neatly to anything on your drawing.
This is a common situation for OEM procurement teams and engineers sourcing turret-punched parts for the first time—or the fifth time with a new supplier. The cost of CNC turret punching is not a single variable. It is a composite of several factors that interact differently depending on your part geometry, material, batch size, and design choices. Understanding these factors is what separates a quote you can evaluate from one you can only accept or reject.
This guide breaks down the cost structure of CNC turret punching into five dimensions, explains how your design decisions influence each one, and provides a framework for reviewing quotes before you commit to a purchase order.
What Makes Up the Cost of a Turret-Punched Part
A turret punching quote is not a single number pulled from a rate card. It is the sum of several cost components, each driven by different aspects of your part and order. When a quote seems unusually high—or unusually low—the explanation almost always lies in one or more of these five dimensions.
Machine Time: The Hit Count Equation
The most direct cost driver in turret punching is hit count—the total number of punch strokes required to complete one part. A turret press charges by the minute, and every hit adds incremental cycle time.
A simple panel with four mounting holes might require 4 hits. A ventilation grid with 200 identical round holes requires 200 hits. A complex cutout that the shop does not have a dedicated tool for must be “nibbled” out using dozens of overlapping small punches—sometimes 50 to 100 hits for a single feature.
The relationship between hit count and cost is linear. Double the hits, roughly double the machine time. This is why parts with dense perforation patterns or many unique features carry significantly higher per-part costs than parts with a few standard holes.
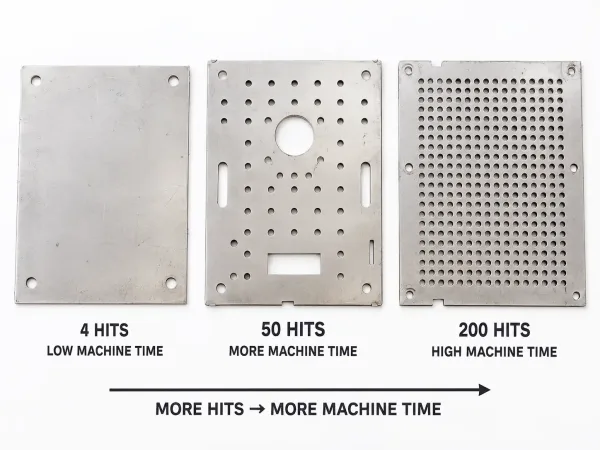
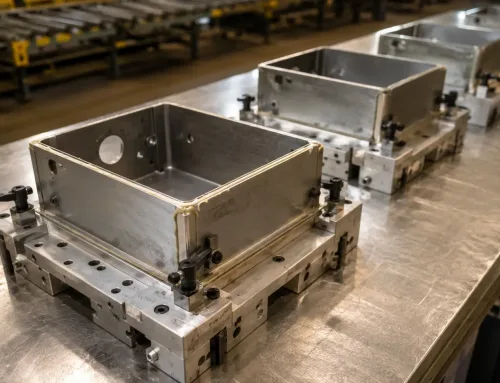
Higher punch hit counts increase machine time and part cost.
Tooling: Standard Stations vs. Custom Punches
A CNC turret press holds a rotating magazine of punch-and-die sets—typically 30 to 50 stations. Standard shapes like round holes, square slots, and oblong cutouts use tools that most fabrication shops already own. These standard tools add zero or minimal tooling cost to your quote.
Custom tooling is a different story. If your part requires a proprietary connector cutout, a D-sub profile, or any non-standard shape, the shop must order a custom punch and die set. Custom tooling typically costs $300 to $1,000 or more per set, depending on complexity and material. This is a one-time charge on the first order—but it adds lead time (often 2 to 4 weeks for tool fabrication) and appears as a separate line item on your quote.
The key distinction: standard tooling is a sunk cost for the shop and rarely appears on your quote. Custom tooling is a project-specific investment that you pay for directly.
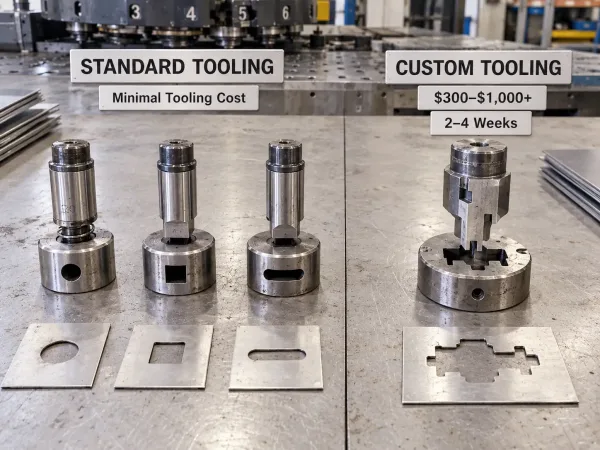
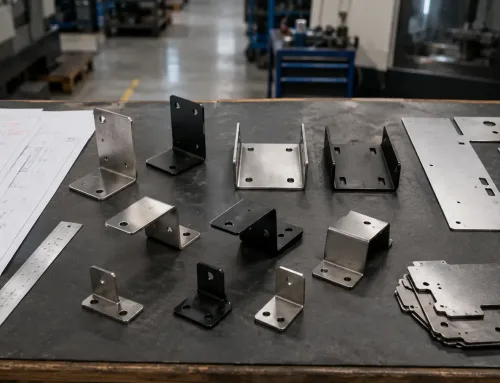
Standard tools usually avoid tooling charges, while custom profiles require dedicated punch and die sets.
Setup and Changeover
Before production begins, an operator must load the correct tools into the turret stations, align the sheet, and verify the first part. This setup time is billed to you.
Setup time scales with the number of unique tools your part requires. A part with 3 different hole sizes needs 3 tool stations loaded. A part with 12 different hole sizes, 2 slot widths, and a custom cutout needs 15 stations—and possibly a mid-run tool change if the turret does not have enough stations to hold them all at once.
Consolidating hole sizes in your design—for example, using a single 6 mm mounting hole instead of mixing 5.5 mm and 6.5 mm—directly reduces setup time and cost.
Material and Thickness
Material selection and sheet metal thickness affect punching cost through two mechanisms: tonnage requirement and tool wear rate.
Thicker sheets require higher punching force. A 3 mm mild steel panel needs substantially less tonnage than a 6 mm stainless steel panel. Higher tonnage increases stress on the punch tips and turret assemblies, which accelerates tool wear and increases maintenance frequency.
Material hardness compounds this effect. Stainless steel, for example, requires roughly 20–30% more shear force than mild steel at the same thickness. Harder materials also increase the risk of galling (adhesive wear) between the punch and die, which shortens tool life and may require more frequent regrinding.
The practical impact: visually similar parts in different materials can produce significantly different cost profiles, even when the geometry is identical.
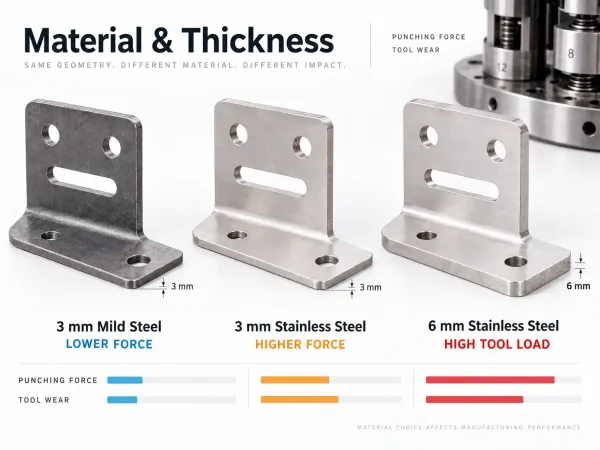
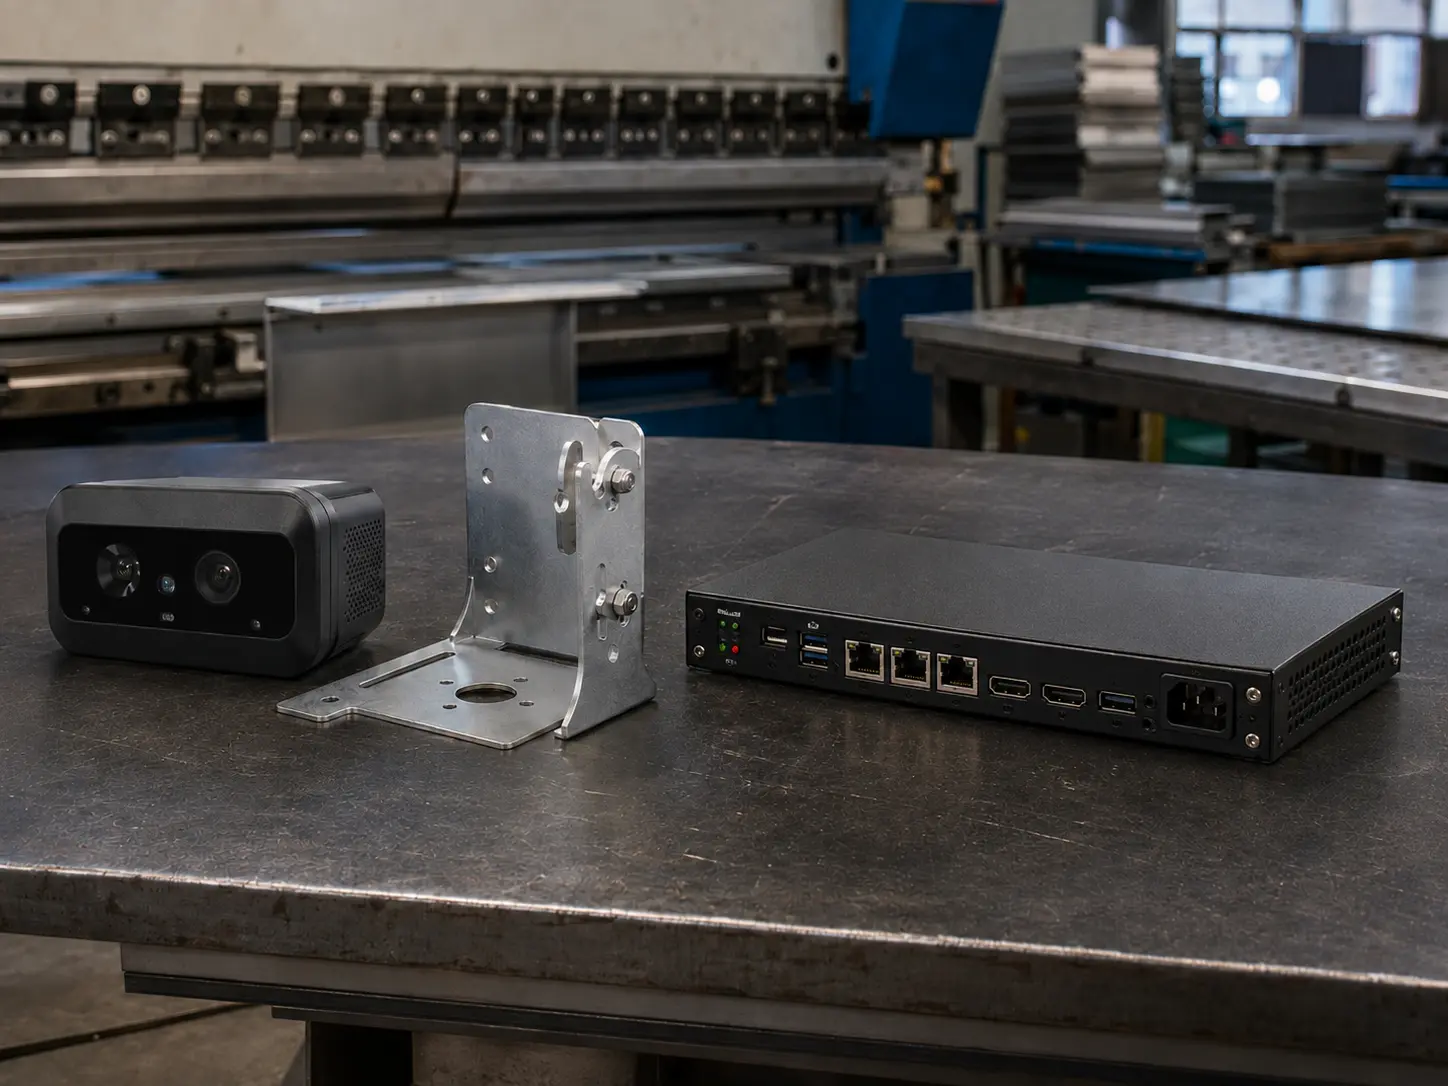
Thicker and harder materials require more punching force and increase tool wear.
Secondary Operations
Turret punching creates a mechanically sheared edge with a smooth rollover on top and a sharp fracture zone on the bottom. For many applications, this edge condition is acceptable as-is. For others, it triggers downstream work that adds cost.
Metal deburring is the most common secondary operation. Parts with small holes, tight spacing, or cosmetic surface requirements often need mechanical or manual deburring before they move to bending, welding, or assembly.
Flatness correction can be necessary after dense perforation patterns. Hundreds of punch strokes introduce localized deformation that may compromise part flatness, especially on thinner gauges.
Reaming or secondary machining may be required for holes with tolerances tighter than what turret punching can reliably hold (typically ±0.1 mm).
Each of these operations adds labor time per part. When secondary operations are avoidable through design changes, they represent a cost reduction opportunity.
How Part Design Decisions Change Your Punching Cost
Every feature on your drawing communicates a cost signal to the fabrication shop. Some features are inexpensive to punch. Others drive cost up in ways that are not obvious until you see the quote. Understanding these signals allows engineers and procurement teams to make informed trade-offs before the design is locked.
Non-Standard Hole Profiles and Custom Tooling
Standard round, square, and rectangular holes use tools that the shop already has in the turret. The tooling cost for these features is effectively zero.
The moment your design specifies a non-standard profile—a D-sub connector cutout, a proprietary mounting slot, or a custom ventilation shape—the shop must order dedicated tooling. This introduces three costs: the upfront tooling charge (300–1,000+), the lead time for tool fabrication (2–4 weeks), and the lifecycle cost of tool replacement over long production runs.
Where possible, match your cutout geometry to standard tool profiles. A rectangular slot with rounded corners that matches a standard oblong tool costs nothing in tooling. The same slot with sharp internal corners may require custom tooling or nibbling—either of which increases cost.
Small Hole Diameters Relative to Material Thickness
A widely accepted engineering guideline is that the minimum punched hole diameter should not fall below the material thickness. When the hole diameter approaches or drops below this threshold, punch deflection increases, tool wear accelerates, and the risk of burr formation rises.
Small holes require tighter punch-to-die clearance, slower stroke speeds, and more frequent tool inspection—all of which increase cycle time and per-part cost. In high-volume runs, the cumulative effect of maintaining tight tolerances on undersized holes can be substantial.
If a small hole is structurally necessary, consider whether a secondary drilling or reaming operation might be more cost-effective than pushing the turret punch beyond its reliable range.
Dense Perforation Patterns
Perforated panels—ventilation grids, acoustic screens, filtration mounts—can require hundreds or thousands of punch strokes per part. Each hit adds cycle time, and the cumulative effect scales linearly with hit count.
Dense patterns also accelerate tool wear. Repeated high-impact loading causes micro-chipping at the punch edge, which increases burr height progressively across a production batch. This means the first 1,000 parts may have cleaner edges than the last 1,000 parts unless the tool is reground mid-run.
Increasing the pitch (spacing between holes) or reducing the number of perforations often lowers cost without compromising the part’s functional requirements—particularly for applications where airflow, weight reduction, or aesthetics are the primary goals.
Features Near Edges or Bend Lines
When a punched feature is positioned too close to an edge, the surrounding material cannot fully resist the punching force. This can cause edge deformation, tearing, increased rollover, and loss of flatness. The typical design guideline is to maintain a minimum distance of at least one material thickness from the edge to the hole center.
Proximity to bend lines introduces additional complexity. If holes are punched before forming, material elongation during bending can shift hole locations. If punched after forming, additional fixturing is required, which increases cycle time and cost.
Poorly positioned features often result in higher scrap rates, increased inspection load, and rework—all of which inflate the final cost beyond what the initial quote projected.
Volume and Cost — Where Turret Punching Makes Economic Sense
The relationship between order volume and per-part cost in turret punching is non-linear. Understanding this relationship helps procurement teams determine whether turret punching is the right process for their project—and at what volume it becomes the most cost-effective option.
Why Low-Volume Runs Carry Higher Per-Part Cost
In a low-volume order (typically under 100–200 pieces), low-volume NRE and tooling costs—including setup and programming—are spread across very few parts. A $600 custom tooling charge divided across 50 parts adds $12 per piece. The same charge divided across 5,000 parts adds $0.12 per piece.
Setup time follows the same logic. If setup takes 45 minutes and production takes 30 seconds per part, a 50-piece order spends nearly as much time on setup as on actual punching. A 5,000-piece order amortizes that setup over a much larger base.
This is why turret punching quotes for prototype or small-batch orders often appear disproportionately high. The per-part cost is not inflated—it is simply carrying a larger share of the fixed costs.
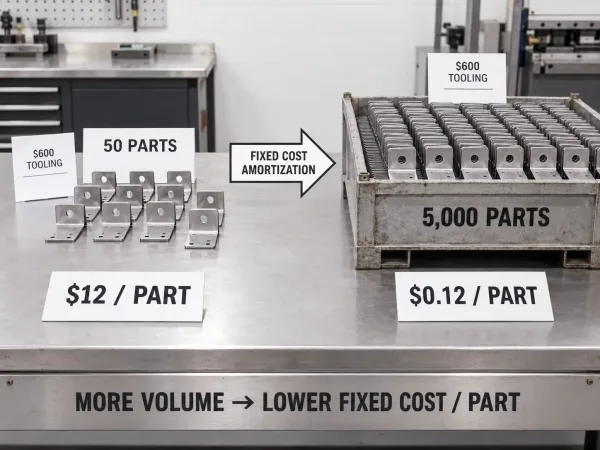
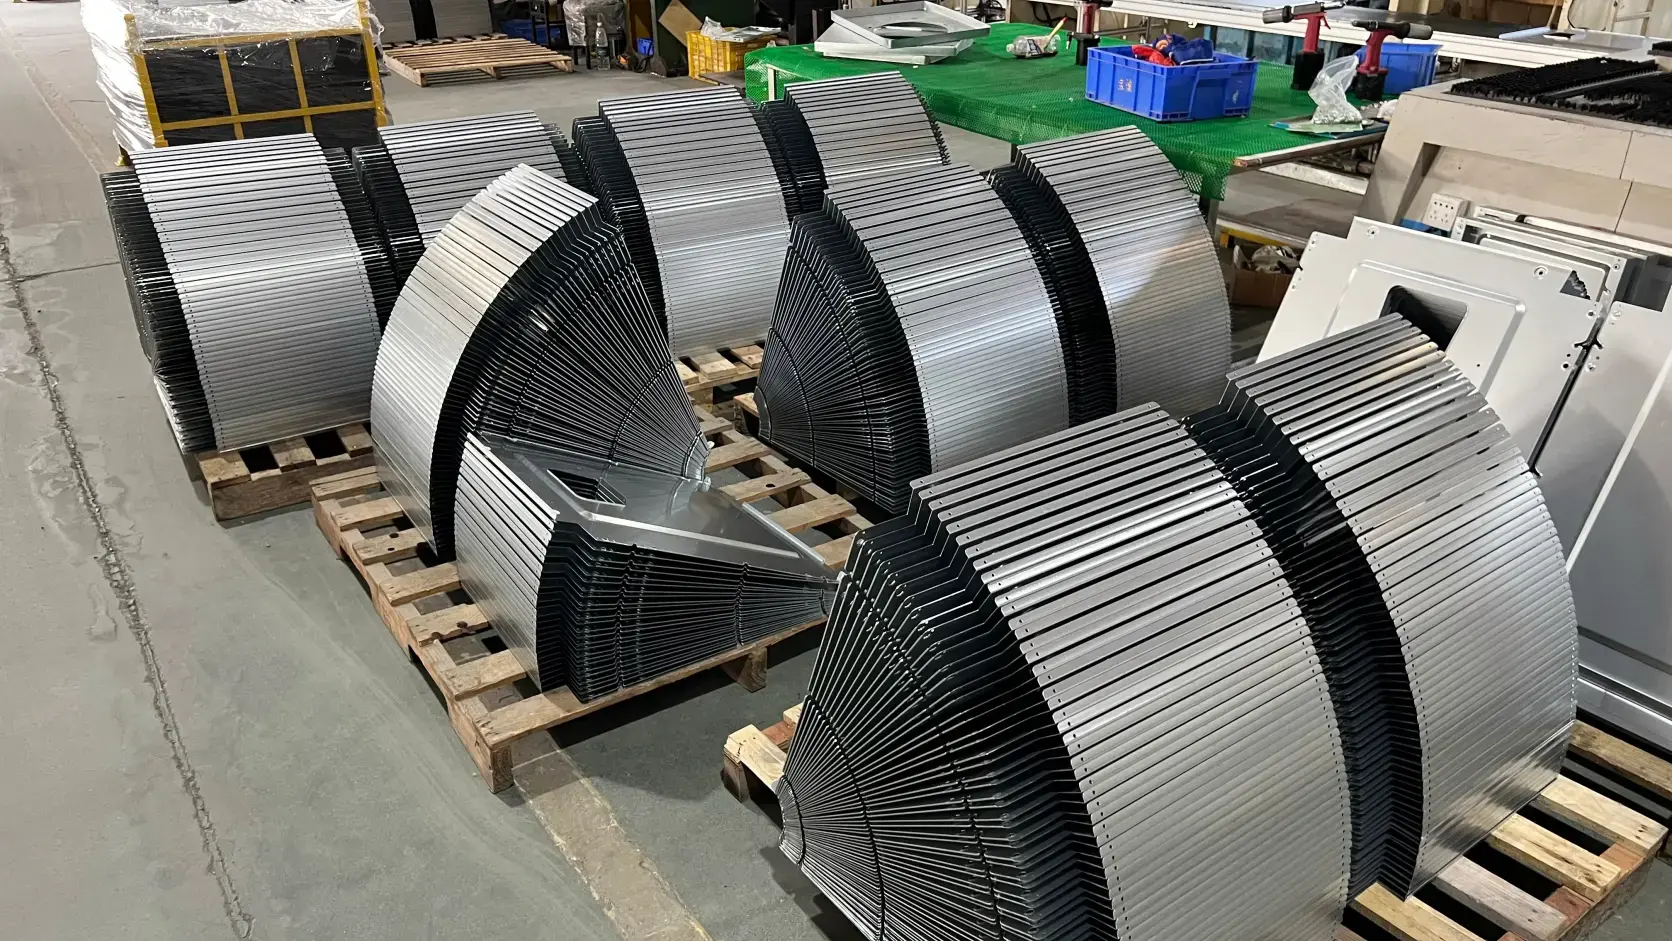
Higher production volumes spread fixed tooling and setup costs across more parts.
The Crossover Point: When Punching Beats Other Processes
Turret punching becomes increasingly cost-competitive as volume rises, particularly for parts with repeated standard features. The general pattern:
- Under 500 parts: Laser cutting often wins, especially for complex geometry, because it requires zero tooling investment and minimal setup.
- 500 to 5,000 parts: The crossover zone. Parts with many standard holes, louvers, or formed features begin to favor punching. Parts with complex contours still favor laser.
- Above 5,000 parts: Turret punching typically delivers the lowest per-part cost for parts with standard features, once tooling is amortized and the fast cycle time dominates the cost equation.
These thresholds shift based on part geometry. A panel with 200 identical round holes reaches the crossover point much earlier than a bracket with 4 custom cutouts.
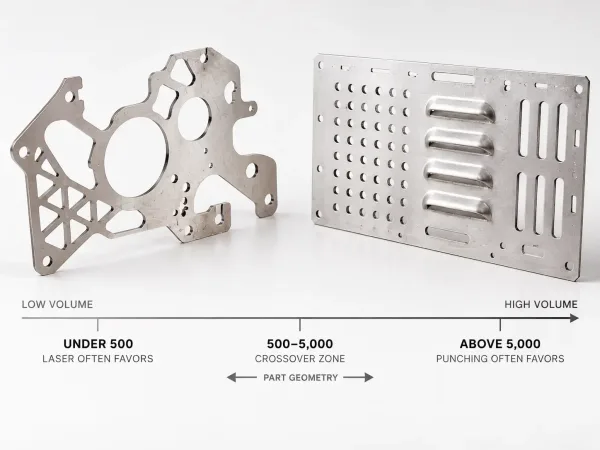
Laser cutting often favors lower volumes, while turret punching becomes more competitive as volume increases.
OEM Project Characteristics That Favor Punching
OEM projects often have specific characteristics that align well with turret punching economics:
Stable designs. OEM products typically go through a defined design validation phase before production. Once the design is frozen, the tooling investment is justified because the same part will be ordered repeatedly over the product lifecycle.
Predictable volumes. OEM procurement often involves scheduled releases—monthly or quarterly orders of the same part. This predictability allows the supplier to amortize tooling and plan production efficiently, which can translate into lower per-part pricing.
Standardized features. OEM enclosures, panels, and brackets often use standardized connector cutouts, mounting holes, and ventilation patterns that match existing turret tool libraries. This minimizes custom tooling charges.
Long-term supplier relationships. OEM buyers who commit to a supplier for the product lifecycle can negotiate tooling amortization, priority scheduling, and volume pricing that short-term or project-based buyers cannot.
Hidden Costs That Often Escape the Initial Quote
The line items on a turret punching quote cover the obvious costs: machine time, tooling, and setup. But several cost drivers do not appear as separate line items—they either hide inside the unit price or emerge after production begins. Awareness of these costs allows procurement teams to ask the right questions before approving a quote.
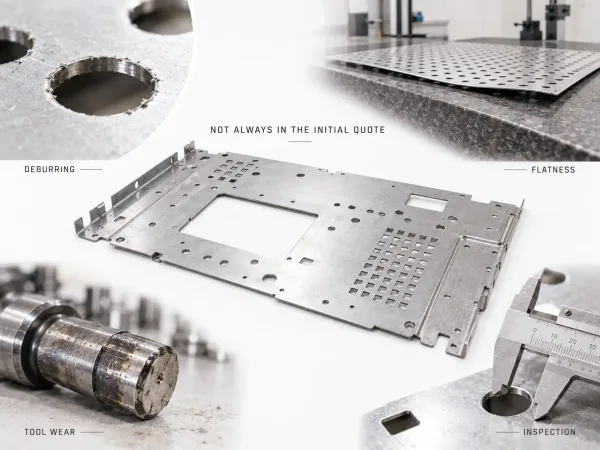
Secondary finishing, flatness correction, tool wear, and inspection can add cost after punching.
Deburring and Edge Finishing
Turret punching produces a sheared edge with a burr on one side. For many parts, this is acceptable. For parts that require clean edges—cosmetic panels, parts that interface with gaskets, or assemblies where burrs could damage wiring or seals—deburring is a necessary secondary operation.
Some suppliers include basic deburring in the unit price. Others list it as a separate charge. If your drawing does not specify an edge condition, the supplier may assume the as-punched edge is acceptable—and price accordingly. If deburring is later found to be necessary, it becomes an unplanned cost addition.
The fix: Specify edge requirements on the drawing. If a burr-free edge is required, state it explicitly. This allows the supplier to include the cost in the original quote rather than adding it later.
Flatness Correction After Dense Perforations
Parts with dense perforation patterns—particularly on thin gauge material—can lose flatness during punching. The cumulative effect of hundreds of localized deformations can bow or warp the sheet. If the downstream application requires flat parts (for example, panels that mount to a frame with a gasket seal), flatness correction through leveling or pressing may be necessary.
This cost is rarely included in the initial punching quote because it depends on the actual behavior of the part during production. It may surface as a quality hold, a rework charge, or a request for design modification.
Tool Regrinding and Replacement Over Production Runs
Custom punch tools wear over time. In a short production run (under 1,000 parts), tool wear is negligible. In a long production run (10,000+ parts), the punch edge degrades progressively, increasing burr height and potentially drifting hole dimensions out of tolerance.
Most fabrication shops regrind tools as part of their maintenance routine, and this cost is typically absorbed into the unit price. However, for high-volume runs with abrasive materials (stainless steel, galvanized steel), tool replacement may be necessary mid-run. If this is not accounted for in the original quote, it can result in a cost adjustment or a quality issue.
Inspection Rework for Tight-Tolerance Features
Standard CNC turret punching holds hole position tolerances of approximately ±0.1 mm. If your drawing specifies tighter tolerances—±0.05 mm or better—the shop may need to slow the stroke rate, use precision-ground tooling, or perform secondary machining on critical features.
Tight tolerances also increase inspection frequency. The shop may need to measure more features per part or use higher-precision instruments, both of which add time and cost. If the tolerance is tighter than what the process can reliably achieve, the rejection rate rises—and with it, the effective per-part cost.
How to Review a Turret Punching Quote — A Buyer’s Checklist
Receiving a quote is not the end of the procurement process—it is the beginning of the evaluation. A well-structured quote should allow you to understand where your money is going and whether the pricing reflects the actual requirements of your parts.
Five Line Items to Verify on Every Quote
- Tooling charges. Are they listed separately? If custom tooling is included, is the cost reasonable for the complexity of the profile? Are there standard tool alternatives that would eliminate this charge?
- Setup time. Is setup billed as a flat fee or amortized into the unit price? How does the setup charge compare to the number of unique tools your part requires?
- Secondary operations. Are deburring, flatness correction, or secondary machining listed as separate line items—or are they assumed to be included in the unit price? If they are not listed, ask whether they are needed.
- Material cost. Is material quoted as a separate line item, or is it embedded in the unit price? If separate, does the material grade and thickness match your drawing specification?
- Quantity breakpoints. Does the quote show pricing at multiple volume levels? If not, ask for a price at 2× and 5× the quoted quantity to understand how the per-part cost scales.
Questions to Ask When the Price Seems High
- How many hits does the part require, and what is driving that count?
- Are any features requiring custom tooling, and can they be redesigned to use standard tools?
- How many unique tool stations are needed, and is a mid-run tool change required?
- Are secondary operations included or excluded from the quoted unit price?
- Is the material specified on the drawing readily available, or does it require special ordering?
What a Transparent Quote Should Look Like
A well-structured quote separates fixed costs (tooling, NRE, setup) from variable costs (per-part machine time, material, finishing). It specifies the Incoterms, states the material grade and thickness, and lists any assumptions about edge condition, tolerance capability, and packaging.
If a quote arrives as a single lump sum with no breakdown, ask for a line-item version. A supplier who cannot or will not provide cost transparency on a turret punching quote may not be the right partner for a long-term OEM relationship.
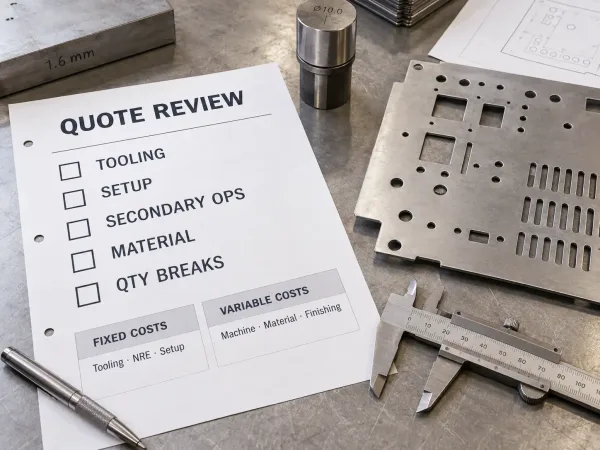
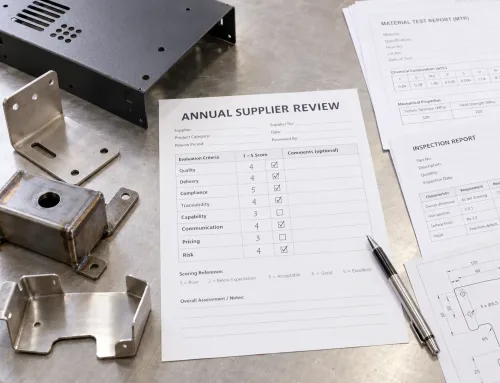
Five line items OEM buyers should verify when reviewing a turret punching quote.
Design Changes That Reduce Punching Cost Without Redefining the Part
Reducing punching cost does not require redesigning the part from scratch. Several targeted adjustments identified during a sheet metal DFM review can lower the quote without changing the part’s form, fit, or function.
Standardize Hole Sizes to Minimize Tool Changes
Every unique hole diameter, slot width, or cutout dimension requires a separate tool station in the turret. If your part uses 6 mm, 6.5 mm, and 7 mm mounting holes, that is 3 stations. Consolidating all mounting holes to a single 6 mm size reduces tool stations, shortens setup time, and lowers cost.
This principle applies across the entire part. Review all hole features and ask: can any of these be unified into a single standard size?
Match Cutout Geometry to Standard Tool Profiles
Before specifying a custom cutout shape, check whether a standard oblong, rectangular, or D-sub tool already covers the geometry. Many connector cutouts can be approximated by a standard rectangular slot with rounded corners—often at zero additional tooling cost.
If a custom shape is unavoidable, define the internal radii on the drawing. Sharp internal corners below the tool’s achievable radius force the shop to nibble the feature, increasing hit count and cycle time.
Adjust Perforation Spacing to Lower Hit Count
For perforated panels, reducing the number of holes—even marginally—has a direct impact on machine time. Increasing the pitch from 5 mm to 6 mm on a 500 mm × 500 mm panel can reduce the hit count by 30% or more, depending on the pattern geometry.
This trade-off should be evaluated against the functional requirement. For ventilation panels, the airflow impact of wider spacing may be negligible. For acoustic panels, the trade-off may be more significant.
Plan Punching in the Flat-Blank Stage
All punching should be completed on the flat sheet before any bending or forming operations. Returning a bent or welded part to the punch press requires additional fixturing, increases cycle complexity, and adds cost.
Design the part from the beginning with this sequence in mind: punch first, then bend, then weld. Hole locations, formed features, and relief cuts should all be planned for the flat-blank state.
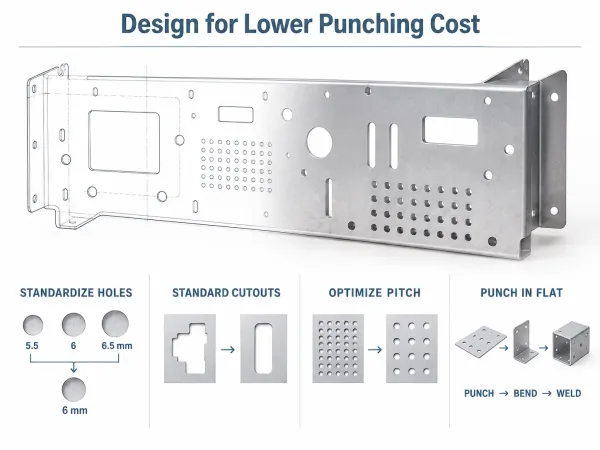
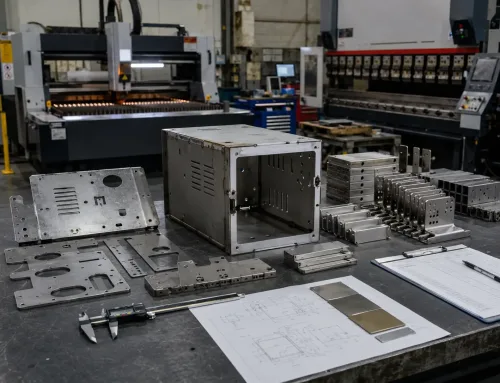
Standardized features and flat-blank punching can reduce tooling changes and machine time.
FAQ
Need a DFM review on your turret-punched parts? Upload your drawings and our engineering team will identify cost drivers, flag potential tooling charges, and suggest design adjustments that can reduce your per-part cost—typically within 24 hours.